
こんちには、フリーのITエンジニアでWeb(PHP:Laravel)のバッグエンドをメインにフルリモートでお仕事させて頂きながら、個人開発でiOSアプリを作っているMoritaです。
FoldingCellを使用してかっこよく折りたたみできるカード型のUIを実装してみたくなったので挑戦してみました。

以下サイトを参考にさせて頂いたのですが、一部記述間違い?バージョンの問題?なのか、そのままマネするとうまくいかないので修正を加えてます。

検証環境
Xcode:11.4.1
Swift:5
FoldingCellをインストール
CocoaPodsをするためにPodfileに追記します。
pod 'FoldingCell'インストールコマンドを実行。
pod install画面を用意
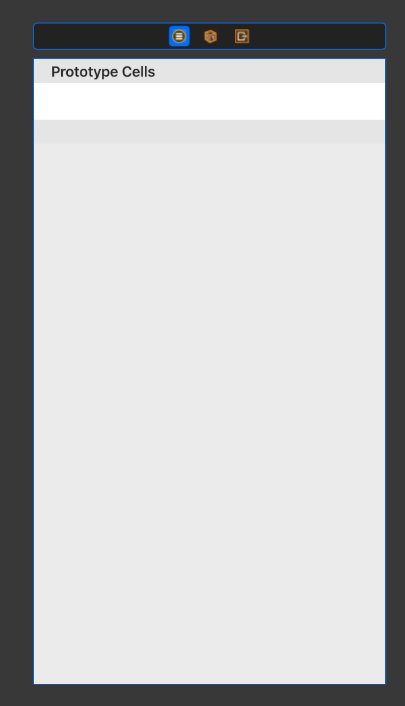
storyboardにUITableViewControllerを追加し、対応するクラスファイルも作成します。
(TableViewのStyleはPlainでもGroupedでもどっちでもいいみたい)
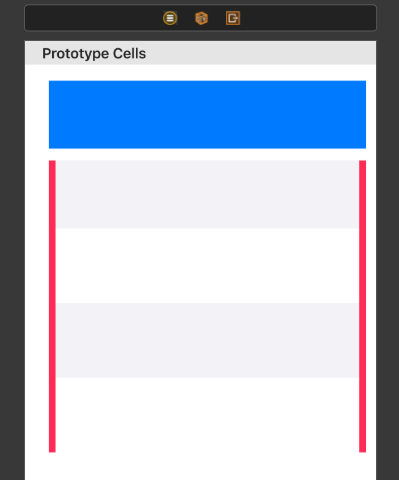
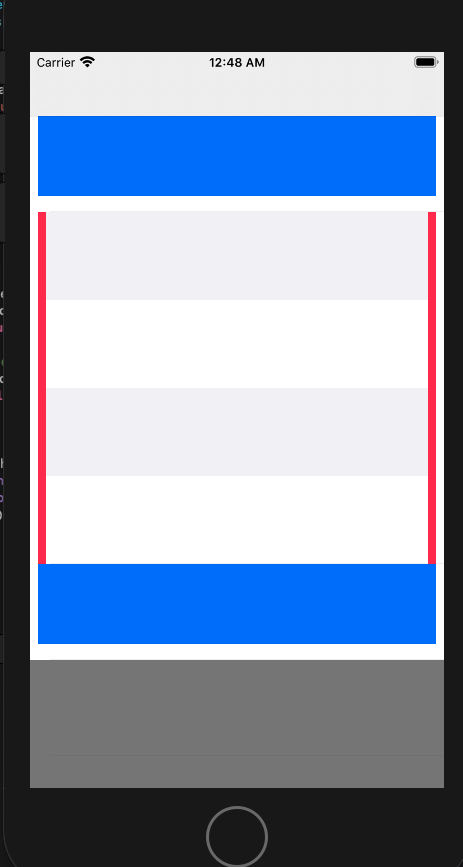
構成の概要
青く塗ってあるセルが閉じている時の状態で、その下にピンクの縁で表示されているのが展開された状態のセルになります。
FoldingCellを継承したカスタムセルを作成
import UIKit
import FoldingCell
class SampleCell: FoldingCell {
override func awakeFromNib() {
super.awakeFromNib()
}
override func animationDuration(_ itemIndex:NSInteger, type:AnimationType)-> TimeInterval {
let durations = [0.26, 0.2, 0.2]
return durations[itemIndex]
}
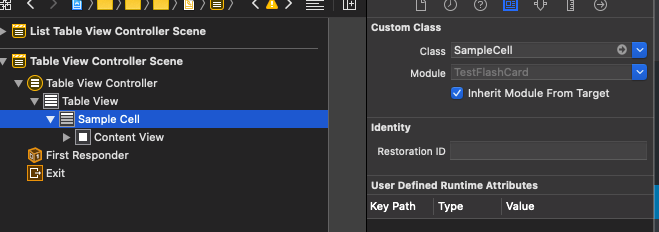
}storybordのTableViewCellにカスタムセルを設定
storybord上のTableViewCellと先ほど作成したカスタムセル(SampleCell)を紐付けます。
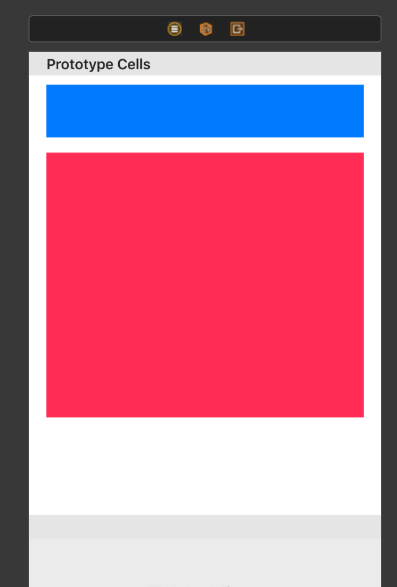
セル上にViewを配置
もとのTavleViewCell(白いところ)を適当に広げて大きくします。
次に閉じている時のUIView(青)と、開いてる時のUIView(ピンク)を配置します。
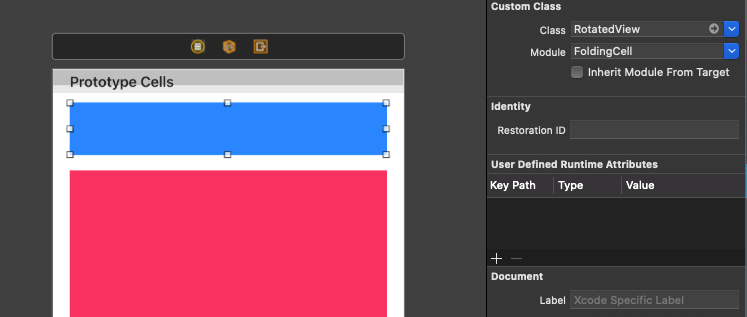
閉じている時のViewにカスタムセルのクラスを紐付ける
閉じている時のView(青)を選択して、ClassにRotatedViewを紐付けます。
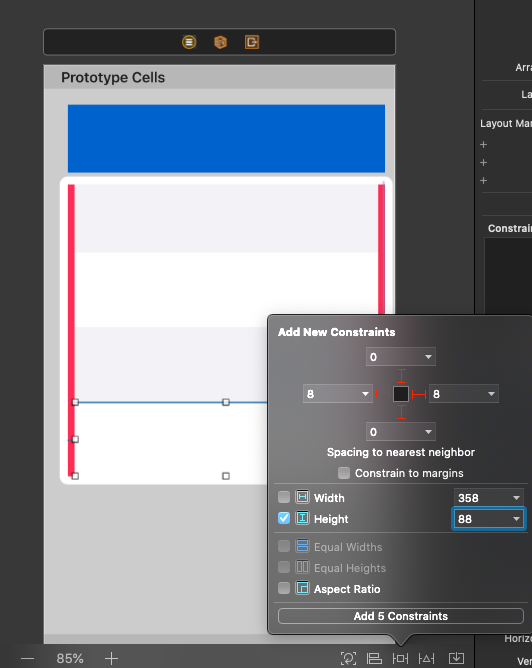
制約の設定
セルに制約を設定します。
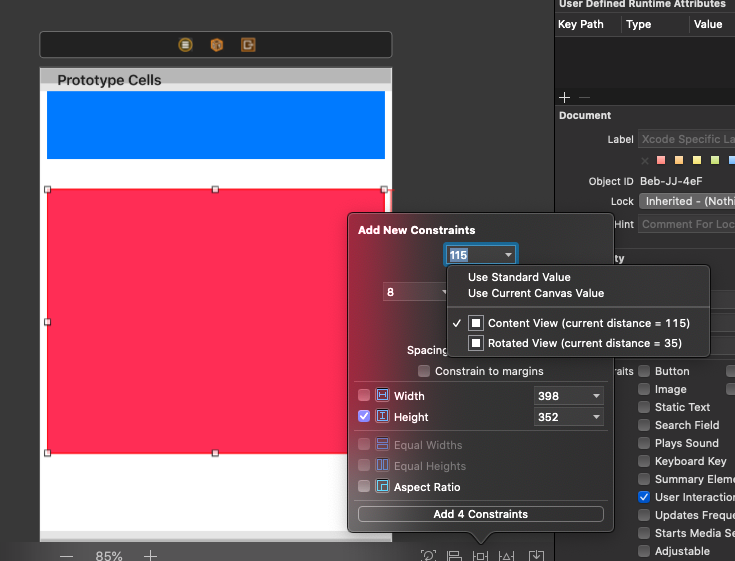
上下左右に自分の好みで設定すればいいですが、開いている時のView(ピンク)のTopは
SurperViewからのスペースになります。
閉じている時のViewは上下:0、左右:8に高さ80を設定。
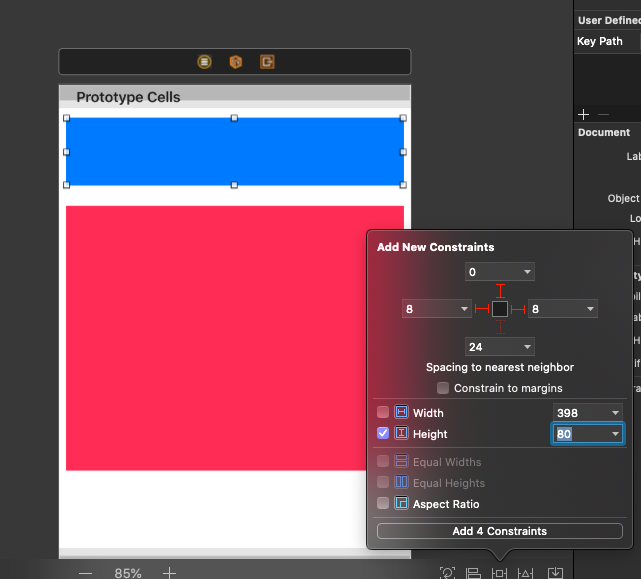
開いている時のViewは上はSurperViewからの位置、左右:8に高さ352に設定。
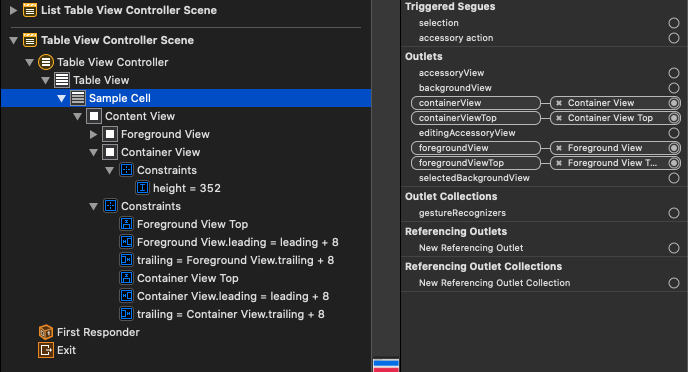
Outlet接続
最初、UITableViewControllerのクラスファイルにOutlet接続したところエラーが発生しました。その方法ではだめみたいです。
開いた時のView(ピンク)の中に展開した時のViewを設定
viewを4つ配置して、上下:0、左右:8と高さ88にしました。
あと、セルがわかりやすいように偶数のViewの色を変更しました。
FoldingCellのプロパティを設定
storyboad上でSampleCellを選択してItem Countを4にします。
Back View Colorが展開時のセルの裏側の色になります。
また、IdentifierをCellを設定しています。

UITableViewControllerのコードを実装
参考記事だとdidSelectRowAtでselectedAnimationメソッドを使用していますが、
廃止されたようで、代わりにunfoldを使用すれがいいようです。
import UIKit
import FoldingCell

class ListTableViewController: UITableViewController {

    private let closeCellHeight: CGFloat = 96
    private let openCellHeight: CGFloat = 352

    private let cellCount = 3

    private var cellHeights: [CGFloat] = []

    static func createInstance() -> ListTableViewController {
        let storyboard = UIStoryboard(name: "list", bundle: nil)
        let instance = storyboard.instantiateViewController(withIdentifier: "ListTableViewController") as! ListTableViewController
        return instance
    }

    override func viewDidLoad() {
        super.viewDidLoad()

        cellHeights = Array.init(repeating: closeCellHeight, count: cellCount)
        tableView.backgroundColor = UIColor.gray
    }

    override func numberOfSections(in tableView: UITableView) -> Int {
        return 1
    }

    override func tableView(_ tableView: UITableView, numberOfRowsInSection section: Int) -> Int {
        return cellCount
    }

    override func tableView(_ tableView: UITableView, heightForRowAt indexPath: IndexPath) -> CGFloat {
        return cellHeights[indexPath.row]
    }

    override func tableView(_ tableView: UITableView, cellForRowAt indexPath: IndexPath) -> UITableViewCell {
        guard let cell = tableView.dequeueReusableCell(withIdentifier: "Cell") as? SampleCell else {
            fatalError("Could not create SampleCell")
        }
        return cell
    }

    override func tableView(_ tableView: UITableView, didSelectRowAt indexPath: IndexPath) {
        guard case let cell as SampleCell = tableView.cellForRow(at: indexPath) else {
            return
        }

        var duration = 0.0
        if cellHeights[indexPath.row] == closeCellHeight { // open cell
            cellHeights[indexPath.row] = openCellHeight
            cell.unfold(true, animated: true, completion: nil)
            duration = 0.5
        } else {// close cell
            cellHeights[indexPath.row] = closeCellHeight
            cell.unfold(false, animated: true, completion: nil)
            duration = 1.1
        }

        UIView.animate(withDuration: duration, delay: 0, options: .curveEaseOut, animations: {
            tableView.beginUpdates()
            tableView.endUpdates()
        }, completion: nil)
    }
}
まとめ
いい感じに実装できました。スマフォだと画面が小さいので一画面で多くの情報が表示できるのはいいですね。
なによりアニメーションがあっておしゃれです。


コメント