
はじめに
前回からの続きでSwiftUIのチュートリアル入門になります。

もと記事サイト

Building lists and navigation | Apple Developer Documentation
With the basic landmark detail view set up, you need to provide a way for users to see the full list of landmarks, and t...
developer.apple.com
Step0
このセクションでは、プレビューのサイズや複数のViewをまとめてプレビュー表示する方法を紹介します。
Step1
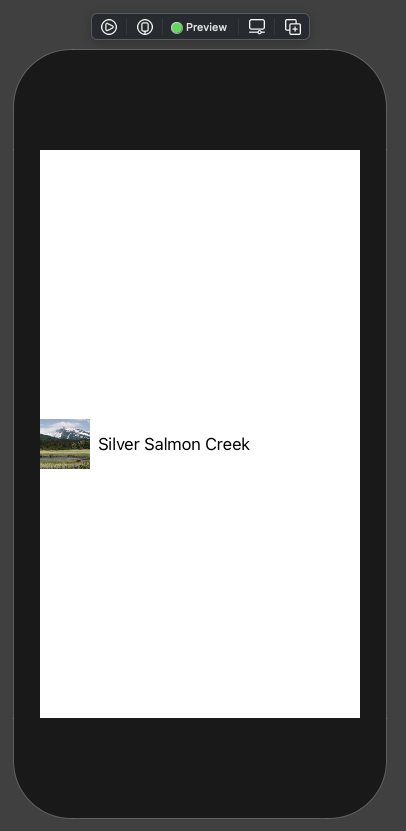
LandmarkRow.swiftのLandmarkRow_Previewsを変更していきます。LandmarkRow(landmark: landmarks[0])のパラメータで指定されている要素番号を1に変更します。
import SwiftUI

struct LandmarkRow: View {
    var landmark: Landmark

    var body: some View {
        HStack {
            landmark.image
                .resizable()
                .frame(width: 50, height: 50)
            Text(landmark.name)

            Spacer()
        }
    }
}

struct LandmarkRow_Previews: PreviewProvider {
    static var previews: some View {
        LandmarkRow(landmark: landmarks[1])
    }
}
プレビューの画像とテキストも自動で変更されます。
Step2
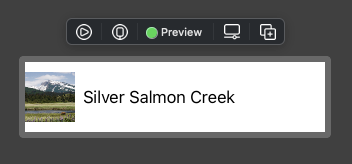
LandmarkRowに対してpreviewLayout(_:)を使用することで、プレビューのサイズを変更します。
import SwiftUI

struct LandmarkRow: View {
    var landmark: Landmark

    var body: some View {
        HStack {
            landmark.image
                .resizable()
                .frame(width: 50, height: 50)
            Text(landmark.name)

            Spacer()
        }
    }
}

struct LandmarkRow_Previews: PreviewProvider {
    static var previews: some View {
        LandmarkRow(landmark: landmarks[1])
            .previewLayout(.fixed(width: 300, height: 70))
    }
}
プレビューのサイズが指定した幅300、高さ70になりましたね!
Step3
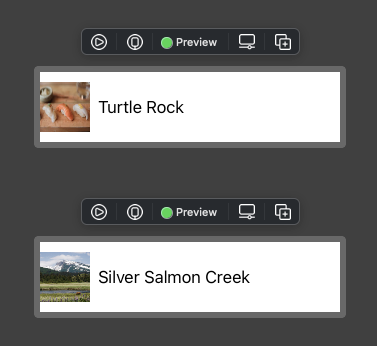
次はGroupを使用して、複数のViewをプレビュー表示させます。
複数のLandmarkRowを記述したものを、Groupで囲みます。
import SwiftUI

struct LandmarkRow: View {
    var landmark: Landmark

    var body: some View {
        HStack {
            landmark.image
                .resizable()
                .frame(width: 50, height: 50)
            Text(landmark.name)

            Spacer()
        }
    }
}

struct LandmarkRow_Previews: PreviewProvider {
    static var previews: some View {
        Group {
            LandmarkRow(landmark: landmarks[0])
                .previewLayout(.fixed(width: 300, height: 70))
            LandmarkRow(landmark: landmarks[1])
                .previewLayout(.fixed(width: 300, height: 70))
        }
    }
}
Step4
Groupに対してpreviewLayout(_:)を使用することで、子ビューすべてに設定を適用することができます。
import SwiftUI

struct LandmarkRow: View {
    var landmark: Landmark

    var body: some View {
        HStack {
            landmark.image
                .resizable()
                .frame(width: 50, height: 50)
            Text(landmark.name)

            Spacer()
        }
    }
}

struct LandmarkRow_Previews: PreviewProvider {
    static var previews: some View {
        Group {
            LandmarkRow(landmark: landmarks[0])
            LandmarkRow(landmark: landmarks[1])
        }
        .previewLayout(.fixed(width: 300, height: 70))
    }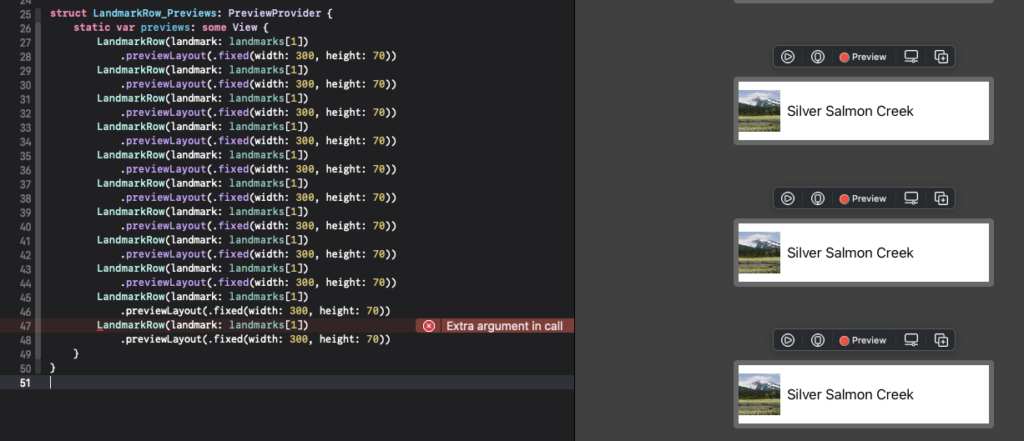
}ちなみに、Groupを使用するもう一つの理由として、View単体での指定は10個までの制限があり、それ以上並べるとエラーが表示されます。これはVStackやHStackを使用した場合でも同じです。

Attention Required! | Cloudflare
stackoverflow.com
10個以上LandmarkRowを並べるとエラーが表示されますね。
まとめ
プレビュー機能もいろいろ便利な機能が実装されているんですね。
このあたりの機能も知っていると、開発する際に便利かもしれないですね。


コメント